Setting Up an Event
First you must set up your EvenSnap account: Explore setting up your EventSnap account here.
After you have set up your EventSnap account, Stripe payment processing, and added users, you’re ready to set up a new event. From the Home screen click the Add New Event button. This is where you will set up the basic information about your event including the name, event link/url, and date. If your subscription includes both EventSnap and AuctionSnap, this process will create both an event and an auction that will share the same name and settings.
Event Settings
The Event Settings page allows you to adjust settings specific to EventSnap as well as the settings shared with AuctionSnap if your subscription includes both products. Making changes here will also affect the auction associated with your event.
| Event Name | The name that you give your event will be displayed prominently throughout the system and in your emails. |
| Event Code | This is what will create your unique event link. https://SITECODE.auctionsnap.com/EVENTCODE/event Keep it short and sweet. If you want to reuse an event code that you have used in the past, you will need to inactivate or change the old event. |
Date | This is the last day that your event page and store will be online. If you need your page online past the date of your actual event, put a later date in this field. |
| Timezone | Your event timezone. |
| Payment Processor | After you have set up a payment processing account, choose it here. Each event can only have one payment processor, and after you start collecting, you cannot change it for the event. |
| Allow Bill Me | Would you like to allow people to check out with the intention to pay later via check/invoice/in-person? |
| Track Attended per Ticket | If tracking attendance, do you want to track attendance to the event as a whole or for each separate ticket type? (i.e. Did they attend the event? vs. Did they attend the dinner? Golf? Performance?) |
| Allow Payment of CC Fees | Offer an additional % amount to cover the cost of your payment processing fees. Define what percentage you would like to offer to everyone, regardless of actual payment method. This amount is treated as an additional donation, and is not a direct calculation of actual fees. |
| Event Logo | The image displayed in your emails and throughout EventSnap and AuctionSnap |
| Show Event Button | Include the link to the event store and registration pages at the bottom of the screen. Customize the text of the event button in the textbox. |
| Show Auction Button | Include the link to your AuctionSnap auction (if your subscription allows) at the bottom of the screen. Customize the text of the auction button in the textbox. |
| Event Privacy/Refund Policy | Populated with a standard boilerplate, but can be customized to reflect your organization’s specific policies as needed. |
Page Builder
The Event Page Builder is where you’ll set up your event homepage. This drag and drop editor makes it easy to create a great looking webpage to maintain your event information, links to purchase tickets and enter the auction, photos, sponsors, and more.
For more information on using the Page Builder, visit Building your Event Homepage.
Tickets and Items
Set up all of the items and tickets that you want to offer in your event store. This is where you define the settings for each item, upload item pictures, stop selling items in the store, etc.
Item Types
There are four different item types, and the settings available to each item will depen on which type is selected.
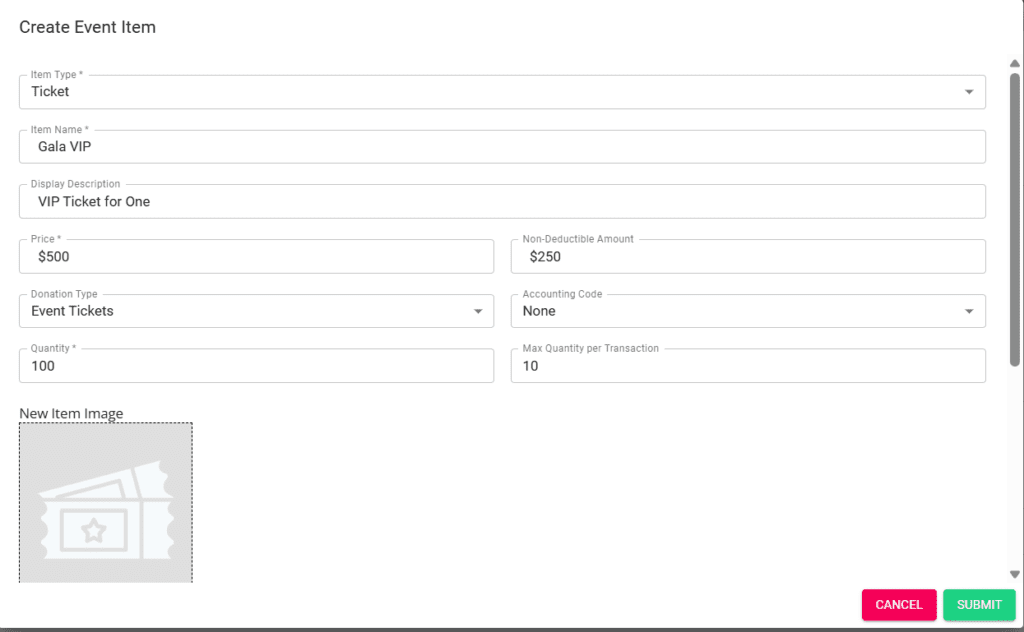
Ticket
The Ticket item type is the bread and butter for most events. Selling tickets allows you to collect guest registrations (name and info) for your event. Set your quantity of tickets available to limit your ticket sales to the capacity of your venue. Set your ticket price, non-deductible amount (fair market value), and upload an item image if desired.
Multiple ticket items can be sold per event. For example if you are running a golf outing with an optional dinner, you could sell tickets to the golfing and then offer a separate ticket to purchase a dinner.
Group of Tickets
For some events, tickets may need to be sold in groups. You may wish to sell an entire table of 8 dinner registrations or a golf foursome. Start by creating a regular Ticket item for the dinner/golfers, and then you can create a Group of Tickets item. If you wish to only sell tickets in a group (don’t allow selling an individual golfer registration, but force a foursome), then you’ll need to check the “Only available as part of a group” box in the Ticket item.
A group can only be linked to one ticket item, and the price is set for the group independent of the single ticket price. Choose how many tickets are included in the group. The quantity available will be calculated using the quantity of single tickets available. If there are 100 Golfer tickets available, then there will be 25 Golf Foursomes remaining. As the number of tickets are sold, the remaining foursomes will be reflected based on those numbers.
If selling sponsorships that include tickets, the Groups of Tickets item type will be the best method to do so. If sponsorships are limited to a certain number, then you will need to use the “Hide from Store” setting manually after they have sold out.
Merchandise
If you are selling things other than tickets such as t-shirts, programs, mulligans, and other merchandise, choose this item type. Set your price, non-deductible amount, and your quantity. Merchandise items do not trigger guest registration or allow for custom user defined fields like tickets.

Free Ticket
A Free Ticket is just like a regular Ticket item. You can link it to registrations, create user defined fields, and track attendance. The primary difference, aside from being no cost, is that Groups of Tickets cannot be linked to Free Tickets. Free Tickets are available only with an EventSnap Pro subscription.
Item Fields
| Item Type | Ticket, Group of Tickets, Merchandise, or Free Ticket |
| Item Name | The name that will be displayed for this item in the event store. |
| Linked Ticket Item (Groups Only) | When a Group of Tickets is selected, select the type of ticket that will be included. Only one type of tickets can be linked to a group. |
| Display Description | If you want to include additional information in the event store under the item name, place that information here. |
| Price | The cost of one item |
| Non-Deductible Amount | Also called Fair Market Value. The system will calculate tax-deductible amounts using this field. Amount minus Non-Deductible Amount equals tax-deductible donation. |
| Donation Type | Used in integrating with Donorsnap or exporting for use in your donor management system. |
| Accounting Code | Used in integrating with Donorsnap or exporting for use in your donor management system. |
| Quantity | Total quantity available for sale. |
| Max Quantity per Transaction | Limit the number of these items that can be placed in a cart at one time. When an item is in a cart, it is reserved for up to 10 minutes. If the visitor has not checked out before the cart expires, the items will be released back to the available pool. Best practice is to use this field to prevent someone from temporarily holding onto too many tickets at one time. |
| Quantity of Tickets Included (Groups Only) | The number of tickets that will be included in each sold group. A golf foursome would put 4 in this field. |
| Item Image | If desired, display a thumbnail image to the left of the item in the store. Clicking on the thumbnail will display a larger image. |
| Link to Registration | This should be checked for most tickets. If you want to collect names and more for a ticket, this box must be checked. If unchecked, tickets will not be assigned to specific guest names. |
| Only Available as Part of a Group | This option will hide the individual tickets from the store. For example if you only want to sell Golf Foursomes, you will need to create a Golfer ticket and then check this option. Then create a Group of Tickets item for the foursome. |
| Hide from Store | If you no longer wish to include this item for sale in the store, check this box. |
| Active | If an item has not been sold already, it can be inactivated so that it does not show up in EventSnap until it is activated. |
Registration
When selling tickets, the option to “Link to Registration” is selected by default. This means you want to collect names and potentially other information about the guest such as meal choice or t-shirt size. Most organizations will want this setting enabled so that you can track who is coming to your event. Without guest registration activated for your tickets, you will only be able to know who purchased tickets. If you need to track custom information for your guests (via user defined fields), registration must be enabled.
Hide from Store
If you no longer want to offer a ticket, group, or merchandise for sale in your store, check the box on this page “Hide from Store” and it will no longer be available for purchase. If you made a mistake with an item and already started selling it, you will need to choose this option because sold items cannot be inactivated or deleted. If it has not already been sold, you can inactivate or delete it.
Best Practice: Use the Max Quantity field
You may not care if someone wants to purchase a large number of items, but if that is not realistic, you should be using the Max Quantity field. When someone adds items to their cart, they are held for them until their cart expires. By setting a max quantity, someone cannot visit your event store and add every item available into their cart. If they were able to, they could negatively affect your ability to sell tickets and items. If you only allow them to add a limited number of each item to their cart, they will not be able to prevent everyone else from using your store.
User Defined Fields
If there is any custom data that you need to collect such as meal choice, t-shirt size, date of birth, photo release, etc. you would do that using User Defined Fields. These custom fields are only available for ticket registrations. If you are selling tickets that are not linked to registration, then user defined fields will not be utilized. You must have registration enabled for a ticket in order to collect information using user defined fields.
User Defined Field Types
| Yes/No | A checkbox field. Checked means yes and unchecked means no. Use for things like photo release or add to mailing list. |
| Dropdown | Predefined options that a guest can select. Use for things like meal choice, t-shirt size, and other standardized options. |
| Integer | When you need to make sure the guest types a number to collect things like ages or other positive, whole numbers. |
| Money | An amount field formatted with a dollar sign and two decimal places. These fields do not affect purchase prices in the store. |
| Text | Collect freeform responses with a text field. If you don’t know exactly what the responses will be, this is your type of field to choose. It could be asking who they want to sit with, general comments, or dietary restrictions. |
| Date | Format a date using MM/DD/YYYY format to collect birthdate, anniversary date, or some other specific date field. |
Display for All Guest Registrations vs. Display for Specific Items
Some user defined fields may be general for the entire event. If you want to display this field for all tickets linked to registration, check this box. It will be one field per guest, but it will be displayed for their registration no matter which ticket they purchase.
If you have information that is specific to a type of ticket, then uncheck that box and use the dropdown below it to select the ticket that this information corresponds with. For example, if you are offering a meal choice that only applies to the Dinner Ticket, then you will want to limit it to just that one field. Each user defined field is tied to the guest, so if you have a Lunch Ticket and a Dinner Ticket that have separate meal choices, then you will need two user defined fields to contain the data. Create one for Lunch Meal Choice and one for Dinner Meal Choice.
If you display a user defined field for multiple ticket types, it wil only store one selection. If you have multiple ticket types, but want to give out one t-shirt to anyone that purchases one of several types of tickets, you would add a T-shirt Size dropdown field and then display it for those ticket types. Then when they purchase any or multiple of those tickets, each guest will only select their T-shirt size one time.
Promo Codes
Set up promo codes to give discounts to your purchasers. This is a great way to give your members a member only price, or to offer discounts to people making larger purchases. Only one promo code can be used per purchase.
| Promo Code | This is what the purchaser will type to redeem the discount. |
| Description | Write a helpful note for your admin/staff to remember what a discount is for or how it works. This is not shown to purchasers in the store. |
| Discount Type | Entire Order or Item(s) Specific: If you only want to require that specific items are added to the cart in order to use a promo, select Item(s) Specific. Otherwise a promo code is eligible for any items added to a cart. |
| Item Discounted | If using the Item(s) Specific discount type, choose which items the promo code is eligible for. |
| Promo Code Method | Choose Dollar Amount to make the discount be an exact dollar number no matter how much the purchase amount or number of items purchased. For example $100 off your purchase. Choose Percentage if you want to allow a variable discount amount based on their purchase amount. The percentage will be based on the Discount Type you have selected. If Entire Order, then the percentage will apply to the entire order. If item specific, then only the amount of those items will receive the percentage off. |
| Percentage/Amount | The percentage or the fixed dollar amount that the purchase will receive as a discount |
| Min Quantity Needed | If you wish to require that a specif number of items be purchased, set that number here. For example, “Buy 4 tickets at $100 each, get the 5th one free.” You would set the minimum quantity to be 5, and then put $100 in the Amount field. This setting also respects the Item(s) Discounted setting. |
| Minimum Purchase Amount Needed | If you want to require a certain dollar amount spent before a promo code is allowed, set your amount here. For example, “Get 10% off when you spend $300” would need $300 put in this field. This setting also respects the Item(s) Discounted setting. |
| Start Date | This is the date and time that the promo code will be activated. If attempted prior to the Start Date, the code will not be accepted. |
| End Date | This is the date and time that the promo code will expire. If attempted after to the End Date, the code will not be accepted. |
| Active | To stop accepting a promo code, uncheck the Active box. |
Example Promo Codes Setup
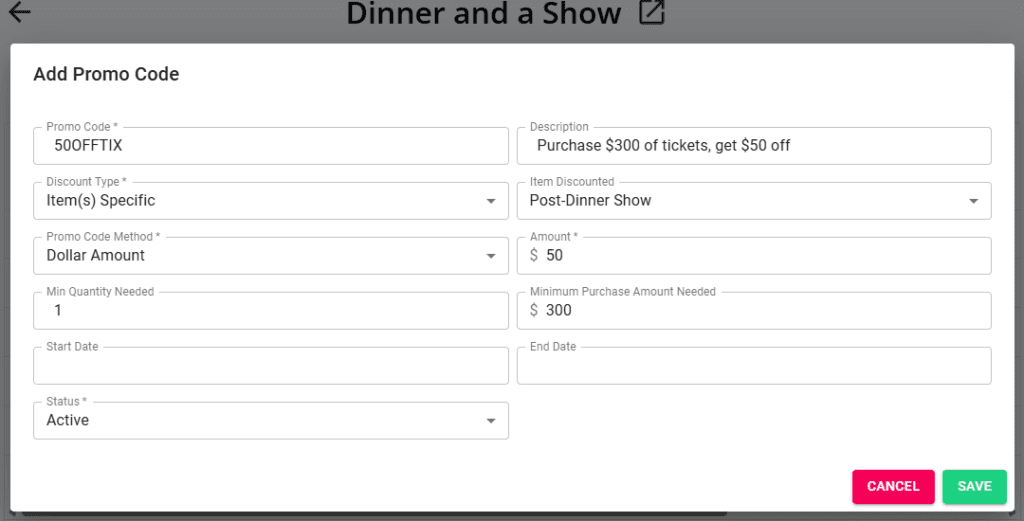
Purchase $300 of tickets, get $50 off:
Buy 3 shirts at $25 each, get one free:

Members get 10% off everything:

Early bird pricing, get 25% off Adult Tickets:

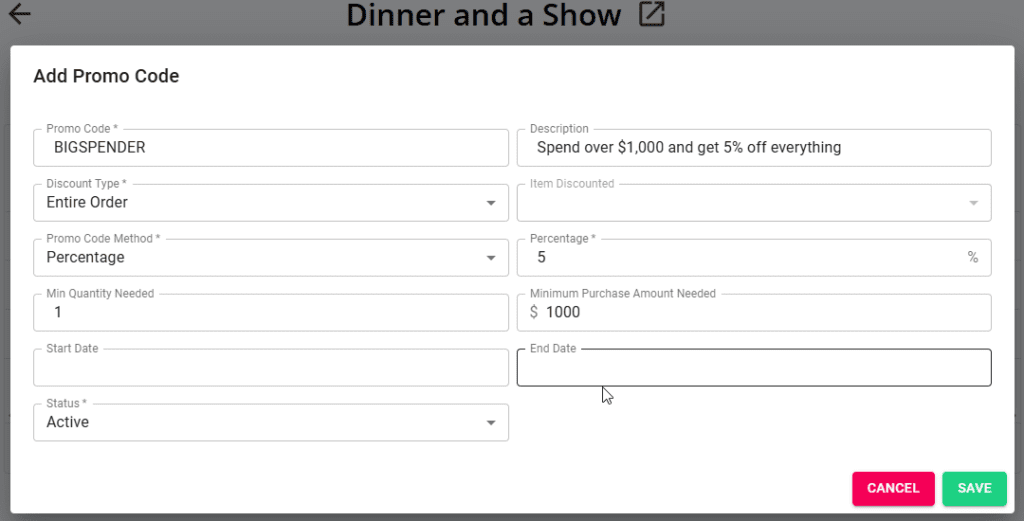
Spend over $1,000 and get 5% off everything:
Email Customization
Set the default content for any of your email types. This is where you manage the content of your receipt emails and the default content for any of your mass emails to purchasers and guests. Each email has a Header section and a Footer section. These will be displayed above and below the information pertaining to the checkout or ticket information.
Example Transaction Receipt Email
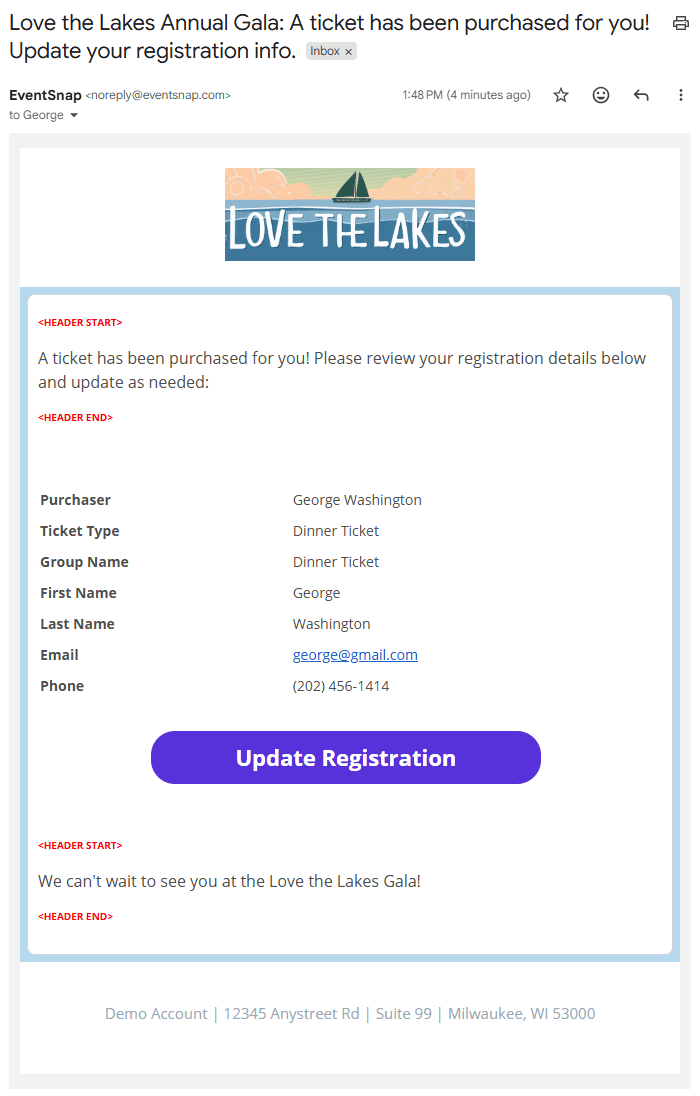
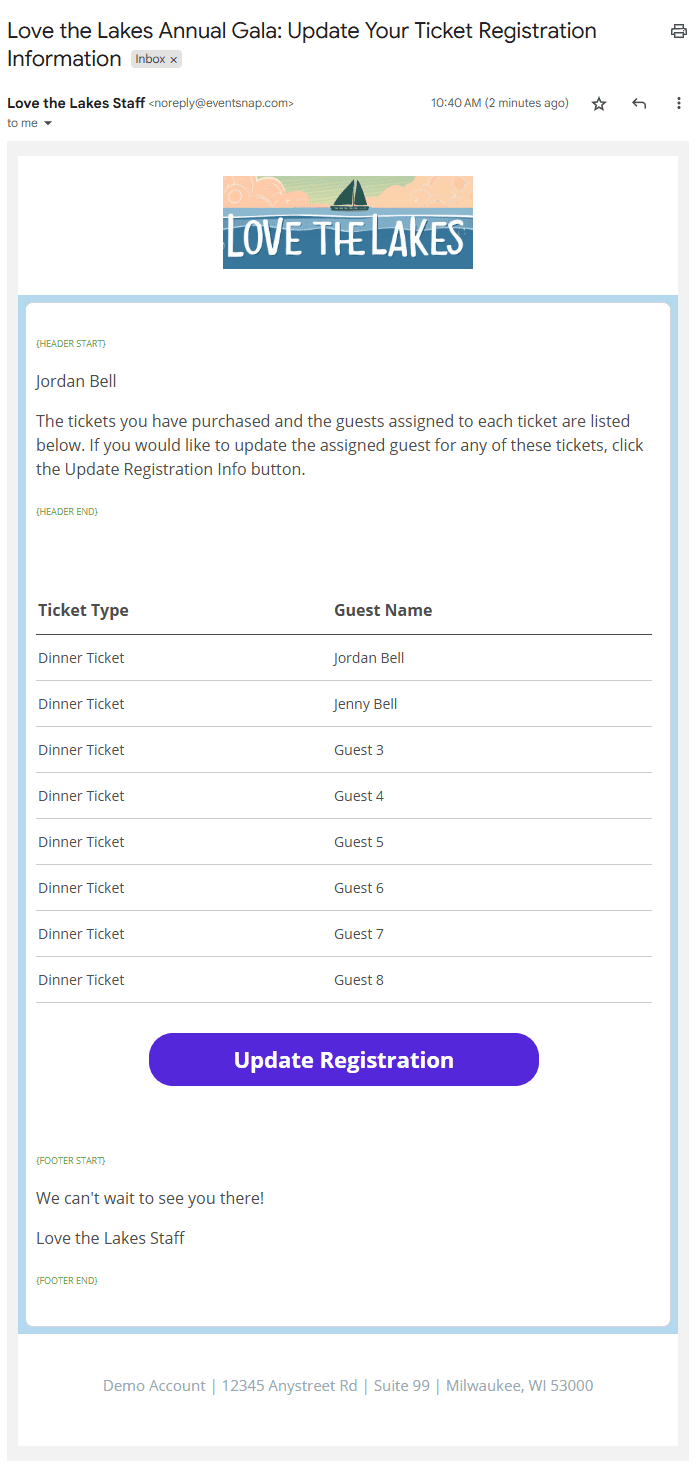
Example Purchaser with Link email (Registration Update)
Example Guest with Link email (Registration Update)