
After the Event – Integrating with Your CRM
EventSnap is integrated directly with DonorSnap, but you can also export your data to Excel for importing into whatever CRM system you are using. The integration with DonorSnap matches your purchasers and guests with existing contact records in your database to prevent duplicates, and be as seamless as possible. The integration is broken up by purchasers/transactions and guests/tickets. Purchases will go into DonorSnap as Donation records, while tickets will create Interaction records.
Purchaser Link/Transfer (Donations)

Integrating your purchasers and donations into DonorSnap takes place in two steps. First you’ll need to link to existing contacts or create them as new contacts. Once you have the contact records ready, you can create the donation records. These two steps are the tabs at the top of the page (“Contact” and “Donation”).
INTEGRATING CONTACTS:
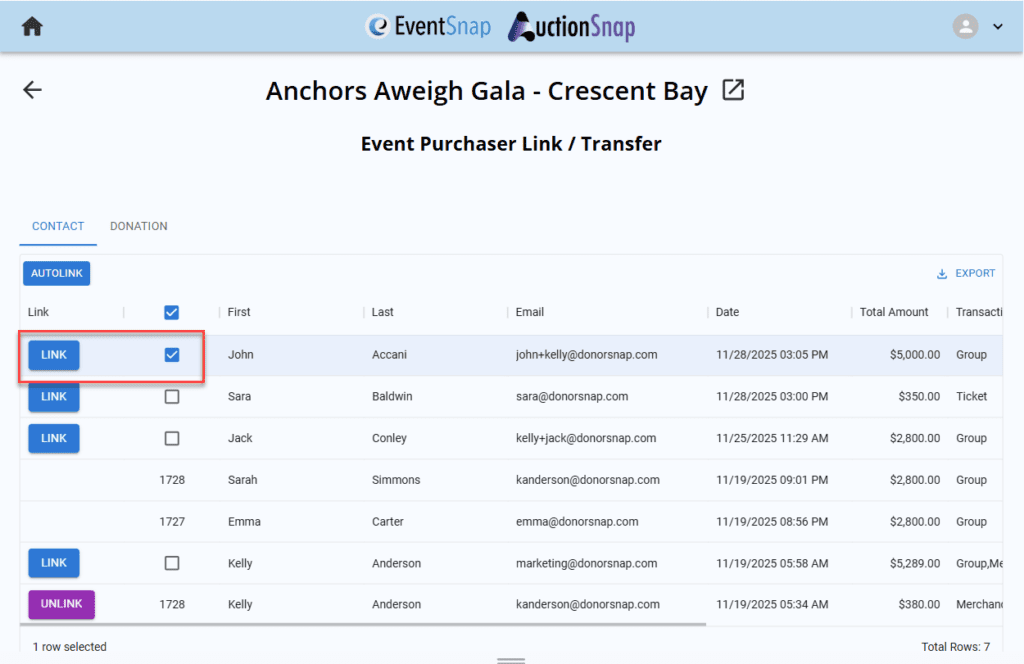
Step 1: Use AutoLink to Find All Purchasers Already in DonorSnap
The first step is to match your purchasers with existing DonorSnap contacts using the Contact tab at the top. The Autolink tool will automatically check for matches in DonorSnap. If exactly one matching email address is found, it will link to that contact record. If multiple possibilities are discovered (duplicate emails or missing emails), it will not know which one to choose and wait on your manual selection. Linked contacts will have the DonorSnap contact number in the second column, replacing the checkbox. Information in EventSnap for these contacts will not overwrite any contact information in DonorSnap. Only a donation record will be created.

If the purchaser email is duplicated in DonorSnap or missing from DonorSnap, then it will not automatically link a contact.
Step 2: Manually Link Remaining Purchasers
If a unique match is not found, click the Link button next to the purchaser. A list of the most likely matches will be displayed. If none of those results are the contact you want to match to, you can manually search using the two search bars above the results.
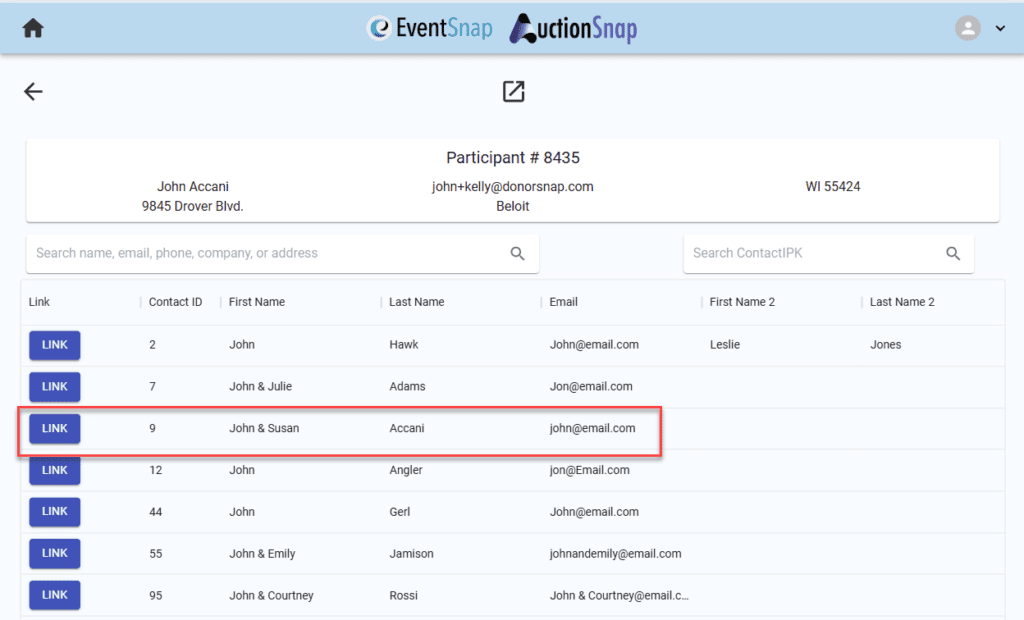
If the contact doesn’t exist in DonorSnap, click the back arrow go back and continue to step 3.
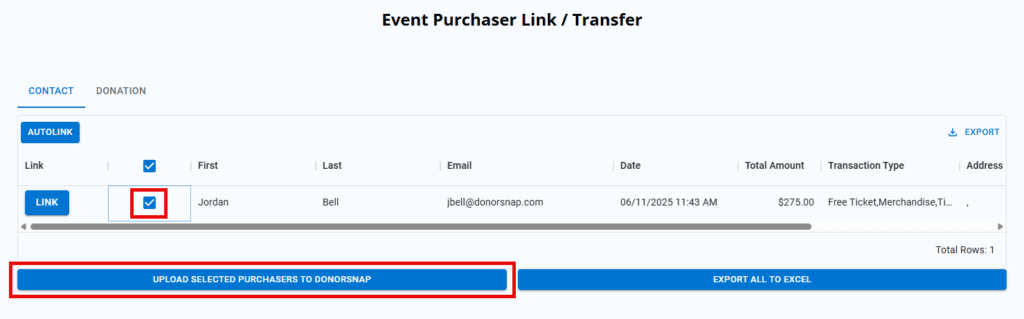
Step 3: Create New Contacts in DonorSnap
If you do not already have a contact in DonorSnap for a purchaser, you will need to create them as a new contact. Check the box in the second column for all purchasers that you want to create new contact records for. Lastly, click the button below “Upload Selected Purchasers to DonorSnap”:
This process will insert the checked purchasers as new contact records along with all of their name and contact information. You will also see the checkbox replaced with the the new contact number from DonorSnap. Contacts created this way cannot be unlinked like manually linked ones can.
INTEGRATING DONATIONS:
Creating Donation Records for All Linked Purchasers
After you have matched your contacts using the steps above, click the Donation tab at the top of the Purchaser Link/Transfer page. Here you will set up the Donation records to be created in DonorSnap. The Donation Type and Accounting Code fields have already been selected using the Item Setup page, but the Batch Code, Campaign and Appeals are selected on this screen. If you need to create a new option, use the box on the right to name it and it will be created for you in DonorSnap.
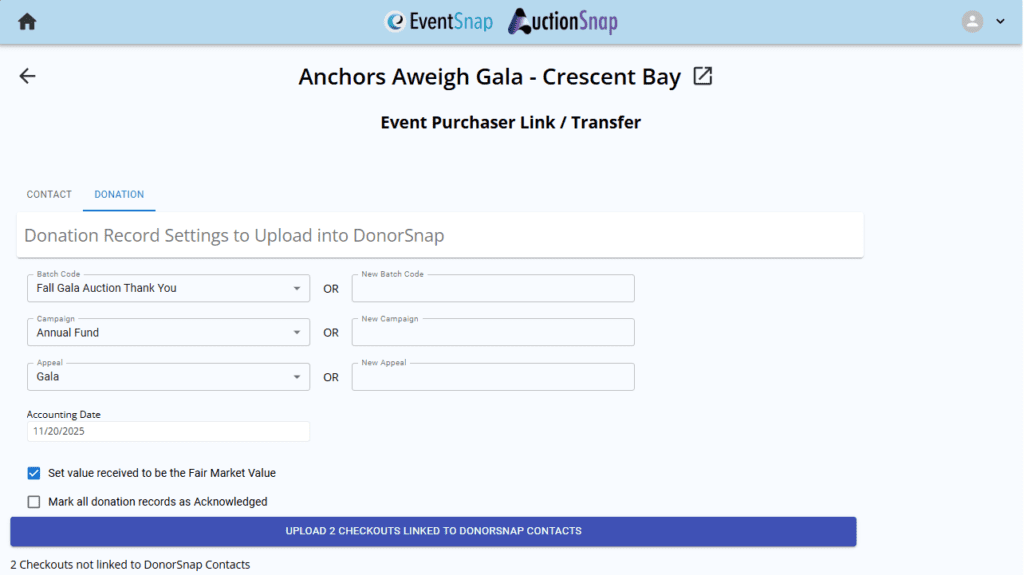
If you want the Value Received field to be populated in DonorSnap with the Fair Market Value (Non-deductible Amount) that you entered in the Item Setup page, check that box. This will calculate the tax deductible amount by taking the total amount minus the non-deductible amount.
If you will not be sending donation acknowledgement letters out of DonorSnap for these purchases, then check the ” Mark all donation records as acknowledged.” This will keep these donation records from being queued up in the Pending Acknowledgements section of DonorSnap.
If any purchases include additional donations or opted to cover the processing fees, fill out the Donation Type and Accounting Code you would like to use for those. Both of these additional amounts are considered additional donations and follow your organization’s tax deductible status.
Once you have all of the settings as you need them, click the “Upload Checkouts Linked to DonorSnap Contacts” button. This will create the donation records immediately. If you go through this process again, the system will ignore purchases that were already integrated with DonorSnap, and it will not create duplicates.
Guest Link/Transfer (Interactions)
Matching your registered guests with contacts in DonorSnap is exactly the same process as described above for purchasers. Link them to existing contacts or create them as new contacts by checking the checkbox and then clicking the “Upload Selected Guests to DonorSnap” button.
Once you have linked up your contacts, move to the Interaction tab at the top. Here you will export the guest interaction data to Excel along with the DonorSnap contact number and you can customize the data as needed and import it into DonorSnap using the Excel Import tool.